

For once, we’ll talk about the good old 2D printing instead of 3D printing. The best home projects are the ones that start from an everyday need, and this one is a very interestring one.
My wife’s work computer isn’t allowed to access USB nor network resources. That’s basic and usual IT policy, but it makes things difficult when she needs to print documents at home.
I already discussed about it on my blog, I have a home server that runs many docker containers, including a Nextcloud instance to manage my files. Nextcloud is awesome and one of the top reasons is that it’s very modular and features tons of apps. One of my favourite apps is Nextcloud Talk; it’s a self-hosted chat server, with apps for Android and iOS. I use mine for notifications from my smarthome system or my 3D printer as explained here.
Combining the need and the existing infrastructure, I imagined this: making a bot that retrieves files from a Nextcloud Talk conversation, checks if the file goes through several checks and finally prints it. I had to dig a bit on how to make this possible, and I came to the system that I will describe below!
Nextcloud Talk conversation
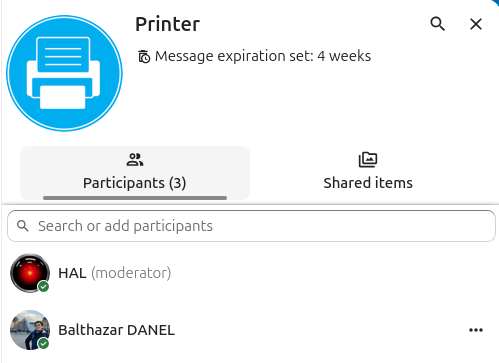
First of all, we need somewhere to put the files to print. My Nextcloud instance has a dedicated user for all automatic and notification processes. I named it HAL, as a tribute to HAL 9000 from 2001 a Space Odyssey.
HAL owns a conversation with it, my wife and myself. That’s the starting point of the system. We’ll put each file we want to print in this conversation.
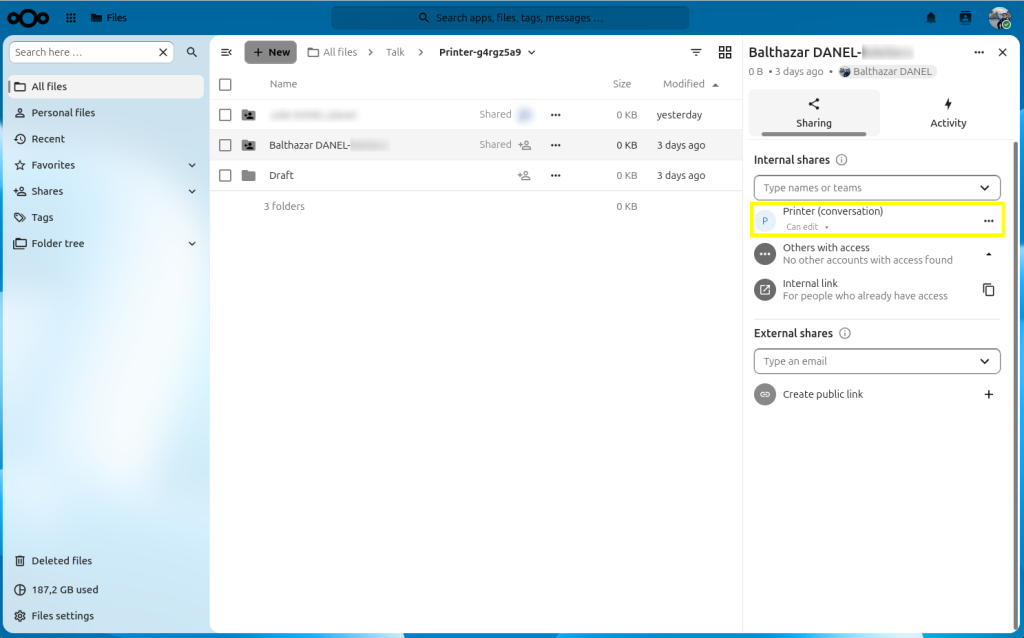
In the Nextcloud world, everything is stored in your personal space. It means that each time you upload a file to the chat, it ends up in a specific conversation folder in your space. A folder then appeared in my documents, under files/Talk/Printer-<conversation unique ID>/ and that’s where all the files I put in the chat will end-up. An additional and important step is to share this folder with all the members of the conversation, otherwise the bot won’t be able to download and print the files you put (yellow rectangle in the picture).
CUPS printer
Next step is to have a default printer on which to send all print jobs. Hardware-wise, I plugged my old Samsung ML-2160 laser printer on my server, which runs Ubuntu.
On the software and OS side, I need a way to install the printer’s driver and being able to reach it from a script. CUPS is the industry standard when it’s about printers on Linux, so it was the logic choice to use it. In addition, CUPS also have a web interface to manager printers and send jobs over your browser. While these features are nice to have, the really interesting one for me is the network sharing of the printer, which permits to directly print without using the Nextcloud bot, for our personal computers.
Installing and configuring CUPS
First of all, install CUPS. Usual and easy with APT, on Ubuntu.
sudo apt-get update && sudo apt-get install -y cups libcupsimage2-devNext step is to configure CUPS, this article helped me to go through the process. There are some lines that are particularly interesting to edit or add in /etc/cups/cupsd.conf, such as those ones:
ServerAdmin <you>@<email>.com
...
+ Listen <computer IP>:631
...
WebInterface Yes/No
...
# Allow access to the web interface from the local network
<Location />
  Order allow,deny
  Allow localhost
  Allow 192.168.1.*
</Location>

# Allow access to the administration pages from the local network
<Location /admin>
  Order allow,deny
  Allow localhost
  Allow 192.168.1.*
</Location>

# Allow access to the admin configuration from the local network
<Location /admin/conf>
  AuthType Default
  Require user @SYSTEM
  Order allow,deny
  Allow localhost
  Allow 192.168.1.*
</Location>
If you have a firewall, don’t forget to open the port 631 and to restart the CUPS daemon
sudo ufw allow 631/tcp
sudo systemctl restart cups.service
Install the printer
The next step is to configure your printer. This one is really printer-dependent, here is how I did for my ML-2160 (Samsung printers division now belongs to HP):
$ cd ~
$ wget https://ftp.hp.com/pub/softlib/software13/printers/SS/SL-C4010ND/uld_V1.00.39_01.17.tar.gz
$ tar -xvzf uld_V1.00.39_01.17.tar.gz
$ cd ./uld<...>
$ sudo ./install.sh

**** Do you agree ? [y/n] : y
**** Are you going to use network devices ? If yes, it is recommended to configure your firewall.
**** If you want to configure firewall automatically, enter 'y' or just press 'Enter'. To skip, enter 'n'. : n
**** Registering CUPS backend ...
**** CUPS restart OK.
**** Print driver has been installed successfully.
**** Registering SANE backend ...
**** Restarting udev ...
**** Scan driver has been installed successfully.
**** Install finished.
Now if the printer is plugged on the computer, the following command should enumerate it:
$ sudo /usr/lib/cups/backend/usb

DEBUG: Loading USB quirks from "/usr/share/cups/usb".
DEBUG: Loaded 118 quirks.
DEBUG: list_devices
DEBUG: libusb_get_device_list=4
DEBUG2: iSerialNumber="Z7D3B8GC5A02RZF"
DEBUG2: Printer found with device ID: MFG:Samsung;CMD:SPL,FWV,PIC,BDN,EXT;MDL:ML-2160 Series;CLS:PRINTER;MODE:SPL3,R000105;STATUS:BUSY; Device URI: usb://Samsung/ML-2160%20Series?serial=Z7D3B8GC5A02RZF
direct usb://Samsung/ML-2160%20Series?serial=Z7D3B8GC5A02RZF "Samsung ML-2160 Series" "Samsung ML-2160 Series" "MFG:Samsung;CMD:SPL,FWV,PIC,BDN,EXT;MDL:ML-2160 Series;CLS:PRINTER;MODE:SPL3,R000105;STATUS:BUSY;" ""
Useful for the next step, locate the PPD file (PostScript Printer Description) corresponding to your model in /usr/share/ppd.
Configure the printer
Last step is to configure the printer, to be the default one and to be properly tuned. Thanks to this article, I went through it smoothly!
Register the printer in CUPS
sudo lpadmin
	-p 'ML-2160'
	-v 'usb://Samsung/ML-2160%20Series?serial=Z7D3B8GC5A02RZF'
	-m 'Samsung ML-2160 Series'
	-P '/usr/share/ppd/uld-samsung/Samsung_ML-2160_Series.ppd'
	-L 'Office'
	-E

sudo lpadmin
	-p 'Friendly name of the printer'
	-v 'Where to find the printer on the computer'
	-m 'Make and model of the printer'
	-P 'Path to the PPD'
	-L 'Location in your home'
	-E  # Enable
Set page size
sudo lpoptions -p ML-2160 -o PageSize=A4Skip blank pages
sudo lpoptions -p ML-2160 -o JCLSkipBlankPages=TrueSet as default printer (finally!)
sudo lpadmin -d 'ML-2160'Checking that everything is fine
Now you can check that everything works fine, as I did:
$ sudo lpstat -t
scheduler is running
system default destination: ML-2160
device for ML-2160: usb://Samsung/ML-2160%20Series?serial=Z7D3B8GC5A02RZF
ML-2160 accepting requests since Wed Jul 22 16:23:03 2026
printer ML-2160 is idle.  enabled since Wed Jul 22 16:23:03 2026

$ sudo lpoptions -l
ColorModel/Color Mode: *Gray
Quality/Quality: *600dpi 1200dpi
InputSlot/Paper Source: *Auto Manual
TonerSaveMode/Toner Save Mode: Save *Standard
EdgeControl/Edge Control: Fine *Normal
PageSize/Page Size: Letter Legal *A4 Executive Folio JB5 B5-ISO A5 COM10 Monarch DL C5 Oficio_S PCard4x6
MediaType/Paper Type: *None Plain Thick Thin Bond Color Card Labels Preprinted Cotton Archive Recycled Envelope
JCLDarkness/Darkness: *NORMAL HIGH LIGHT
Bonus: add the network printer to another PC
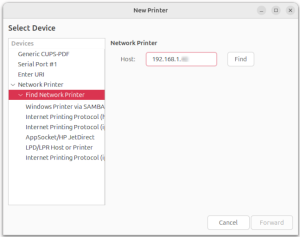
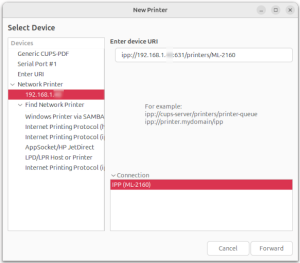
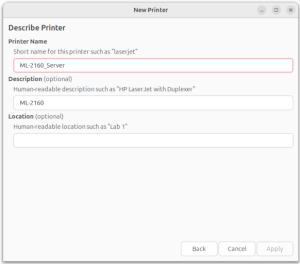
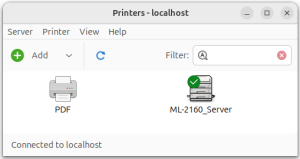
Not linked to the bot, but so handy from other computers. Here is how I’ve registered the network to my own PC with Ubuntu.
One script to run them all
Great, now we have a conversation were we can share files and we have a default printer that works. Last step: writing the bot! I chose to make it with Python 3, because it has many modules and it’s easy to write. The bot starts each time my server boots, thanks to a systemd service.
As (almost) always, I made the code available on my GitHub. The following flowchart explains how the script behaves.
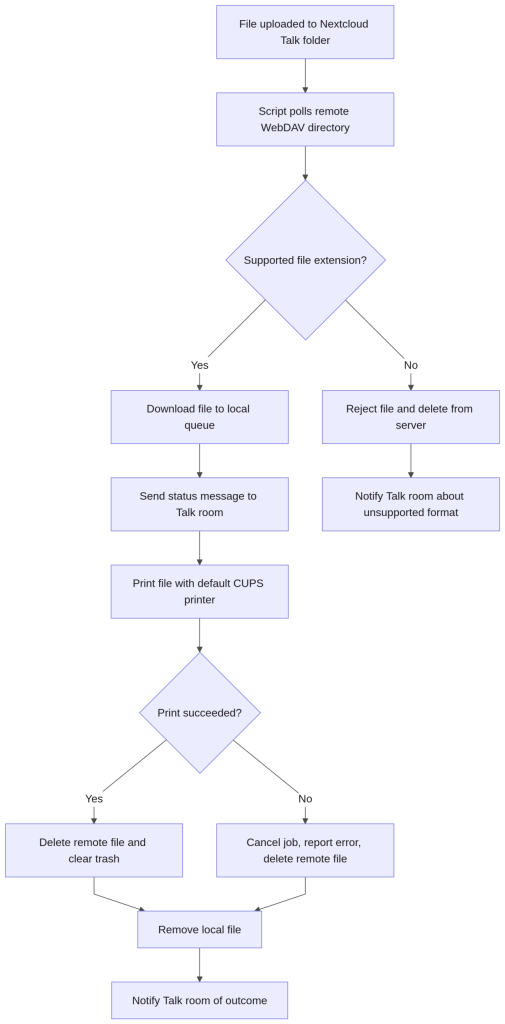
At start, it connects to the folder that will receive the files from the Nextcloud Talk via WebDav with the corresponding module: webdavclient3. It also checks the default CUPS printer of the computer. How? Of course, there is also a Python module for CUPS!
After this phase, it will run the above routine each 30 seconds. This routine system relies on the Python module ischedule, which schedules the work at regular intervals without wasting CPU cycles with sleep commands.
Each time a new file is detected in the shared folder, it is checked to be a “valid” extension (.md, .pdf, .doc, .docx,. txt, .odt). If not, it’s directly deleted. Otherwise, the bot acknowledges the file, notifies the user and prints it through the CUPS module. If everything goes fine, the print is a success, the file is deleted and the user is informed of it.
The deleted files goes automatically to the trash folder of HAL. As it can quickly be a messy and heavy trash, it is also cleaned to be sure that the file doesn’t exist anywhere anymore
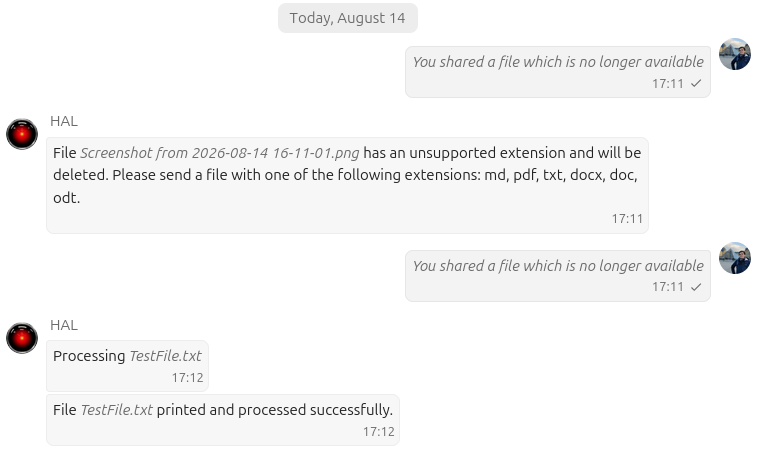
As you can see, as all files are deleted, you can’t (pre)view them later. That’s probably a strong point for privacy!
Conclusion
It’s now one month that we use this new method to print our files, and that’s sow handy and easy! We can even print from the smartphone, which was not in the requirements but end up in the nice to have.
